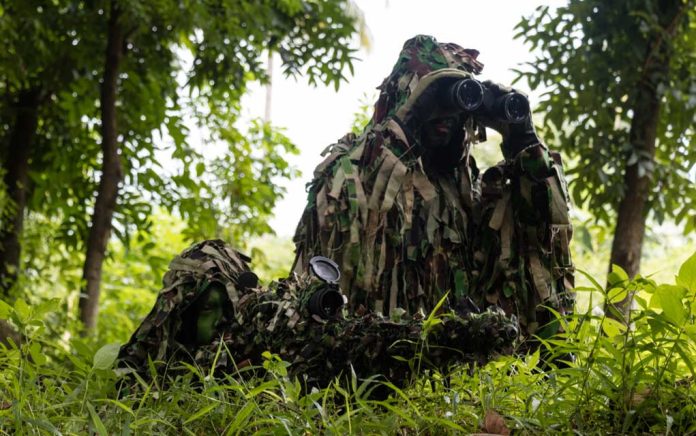
(TacticalNews.com) – As preppers and survivalists, you understand the need to blend with your surroundings. Whether you’re trying to hide from potential prey or a threat, ghillie suits are there for you.
A proper ghillie suit provides excellent concealment, almost enough to allow you to completely blend with your environment. Best of all, ghillie suits can be made in the comfort of your own backyard. Here’s how.
First Thing’s First
Before you set off to build your ghillie suit, you need to do one crucial thing — research your terrain. If you live in a snowy area and build a green ghillie suit, you’ve wasted your time. Not only is your suit useless for concealment, but it also makes you stand out like a sore thumb.
With this in mind, it’s a good idea to take photos of the area you plan to use your ghillie before purchasing materials as you can use them to find materials with the colors and foliage you need to make your suit.
You also need to observe every detail of the area taking into account the time of day you think you’ll be using the ghillie suit. Natural light can change the way terrain looks drastically throughout the day.
If your suit is set up to be used in the evening hours, it will not work as well at noon due to the sun’s brightness. Once you’ve researched the area, you can move onto making the suit.
Step One: Gather the Materials
You can’t just make a ghillie suit magically appear out of thin air. You’ll need to get the right materials to do it. Get some old fishing net or replacement netting, an old jacket or base clothes, some burlap, glue, sewing supplies, and some dental floss or fishing line. You can add some foliage later on.
Step Two: Add the Netting
As the step suggests, it’s time to add that fishing net to your clothes or jacket. Start by cutting the net into long strips that are about two squares wide. Attach the netting to the clothing with needle and thread, making sure you leave about 6 to 8 inches between each strip. Once you’re done sewing, use glue to seal the stitches. You can use dental floss, fishing line, or both to sew the netting to your clothes.
Step Three: Prepare Burlap
Any traditional ghillie suit has burlap strips on it. So, you’ll need to purchase about 4 to 8 pounds of burlap material for each ghillie suit you plan to make. You can get the material from bulk coffee bags, other burlap bags, or netting. If you can’t find burlap, use braided jute twine and separate the braids into individual fibers. Look for natural colors. If you’re not satisfied with the colors you have available, you can dye your materials to make them look more natural.
Step Four: Separate the Braids/Strands
This is the most time-consuming part of making a ghillie suit. You begin by cutting the strips of burlap. Then, you separate the individual strands trimming them to equal lengths. The longer strands go on the sleeves and front of your ghillie suit, and the shorter ones will overlap on the back. Once you’ve done this, you can move on to step five.
Step Five: Tie the Burlap In
Take about 10 to 15 strands and fold them in half, creating a loop. Next, take the loop end and push it under the netting on the vertical squares.
Starting at the bottom, take the hanging ends and feed them through the loops, pull tight, and work upward. Make sure that each row overlaps the one beneath it. You should have 3 or 4 environmental colors per strand. Use random patterning so that no colors are dominant.
Once you’ve used most of the strips of burlap or jute, fluff your suit and inspect it, look for any bare spots, fill them in, and once you’re done, lay the suit out evenly on the floor.
Optional Parts
You can create a ghillie mask or hat by following the same steps you did for the suit. If you want to enhance your suit’s ability to blend, you can add some local foliage. This isn’t really an option with snow on the ground, but it makes excellent camouflage for wooded areas.
An obvious thing you should consider is using the correct foliage for your environment. For example, pine branches are probably not a great idea if there are no pine trees around.
Final Notes
The idea of a ghillie suit is to provide you with concealment via a 3D camouflage. 2D camouflage has its place in the world but does little to nothing to hide the human figure which tends to stand out in the wilderness.
For a more detailed explanation, check out this video by The Grey Bearded Green Beret on Youtube.
As always, remember to test your suit to make sure it serves the purpose you intend. Your first ghillie suit may not be perfect, but that doesn’t mean you can’t make more and improve with each one.
Practice now and perfect your method so that you’ll be ready when the time comes to use your handmade ghillie suit.
Copyright 2020, TacticalNews.com


